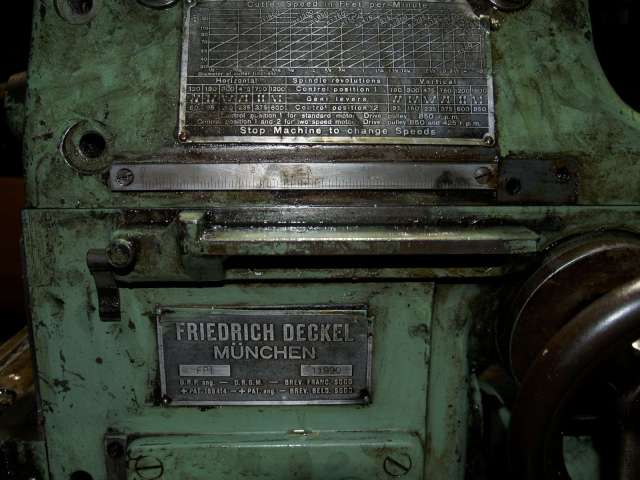
I was cleaning my Deckel yesterday and noticed that I couldn’t seem to get the autofeeds to work. I took this as an excuse to take the whole thing apart to check them out. After spending… ages… cleaning 70 years worth of gear oil out of the base, I got to work on taking it apart… which was a challenge, seeing as I didn’t have a manual.
I got some excerpts from the internet, but they were mostly in German, which I understand nearly none of.
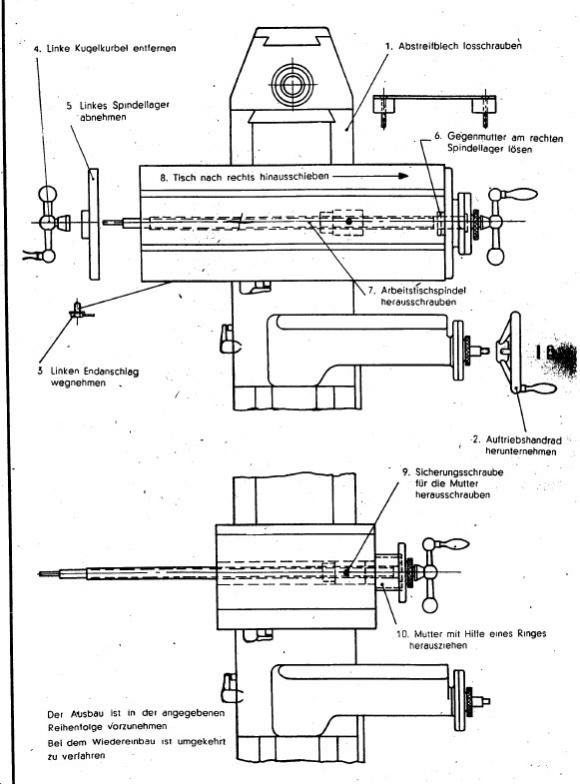
I didn’t even know what a abstreiblech was, let alone how to losschrauben one! In any case, the diagram was still useful. If you also don’t speak German, here’s a quick how-to from me.
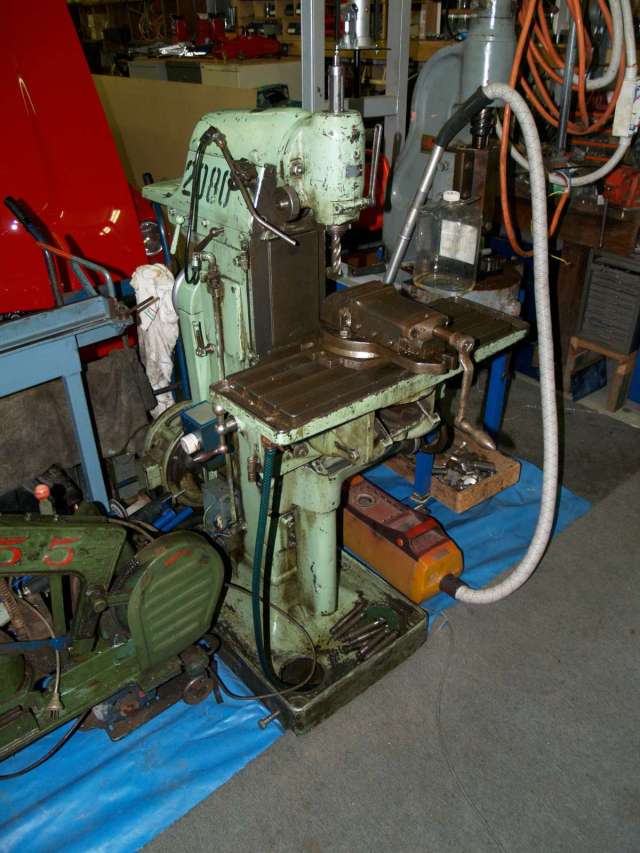
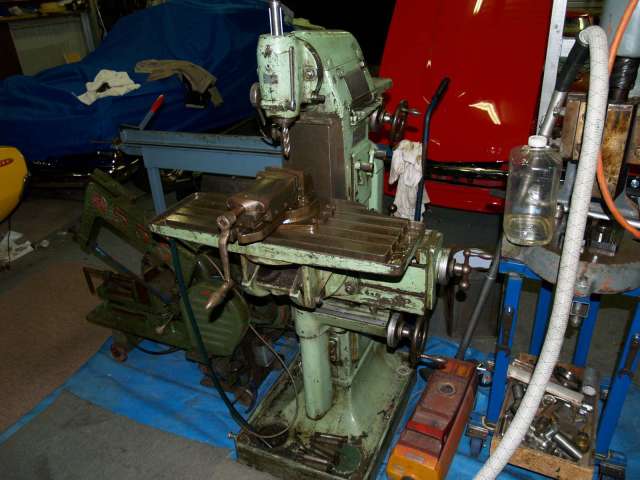
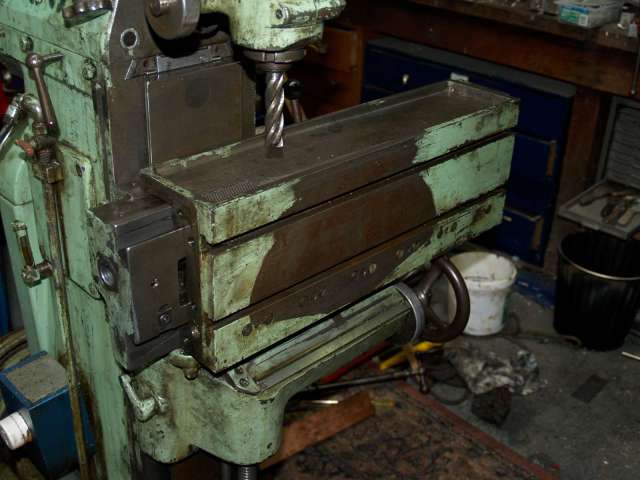
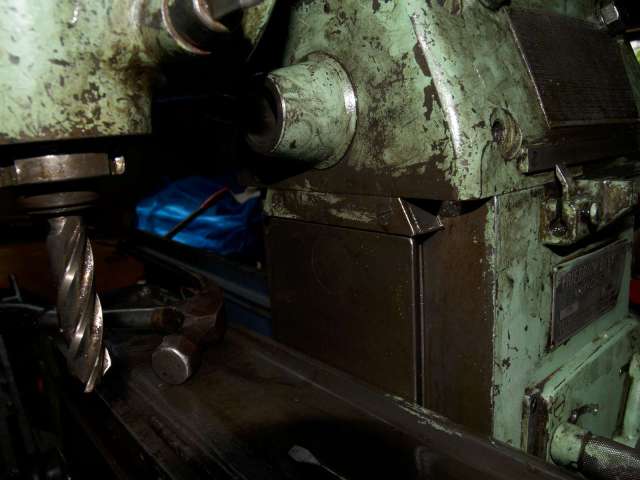
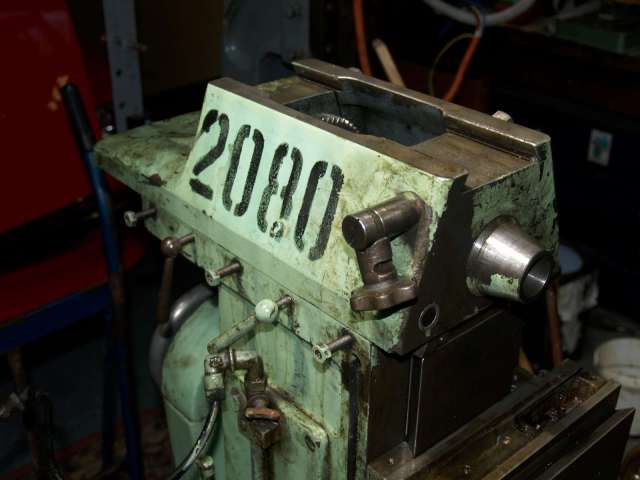
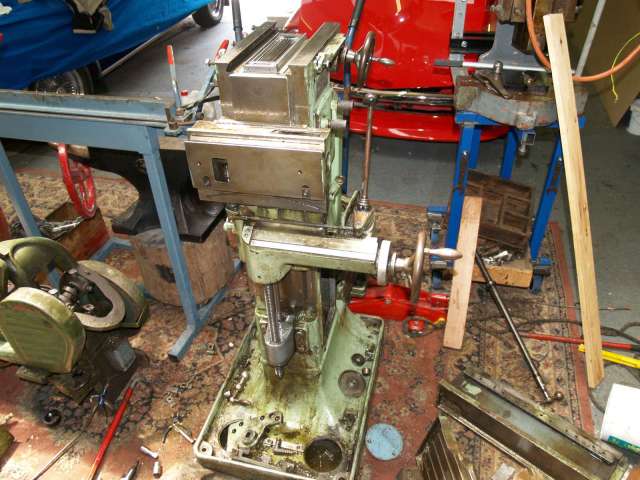
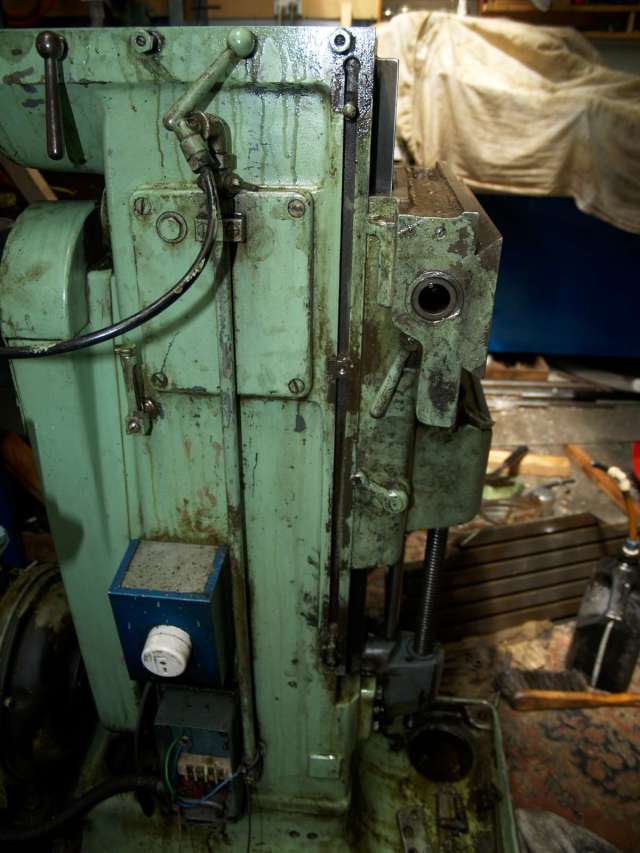
Here’s the beast we’re going to take on:
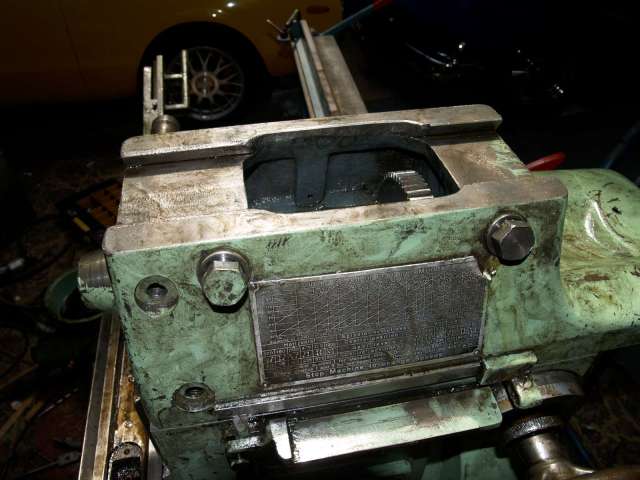
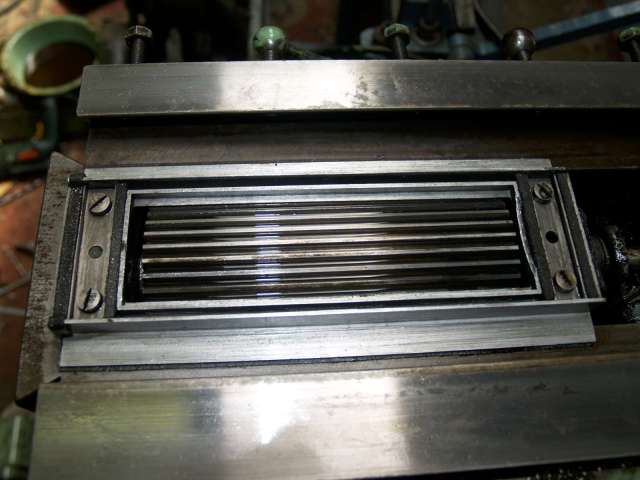
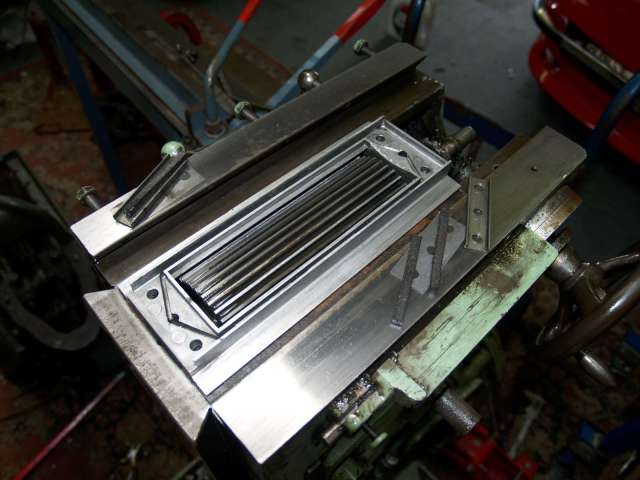
First we need to remove the little cover that keeps the swarf out of the Z axis bed.
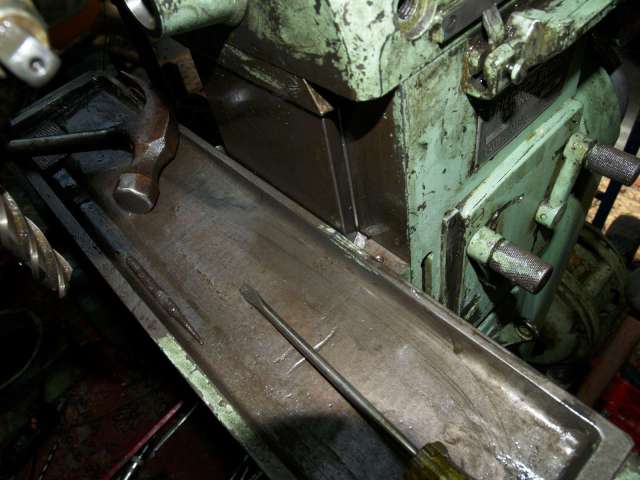
Under the little cover, there’s these things, which seem to route the dirty oil away from the sliding surfaces.
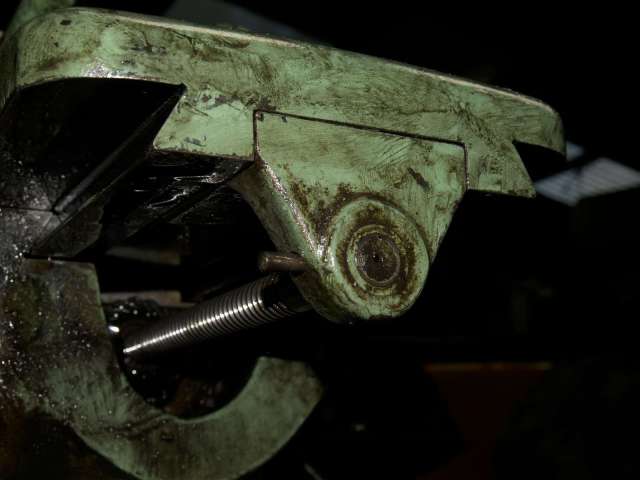
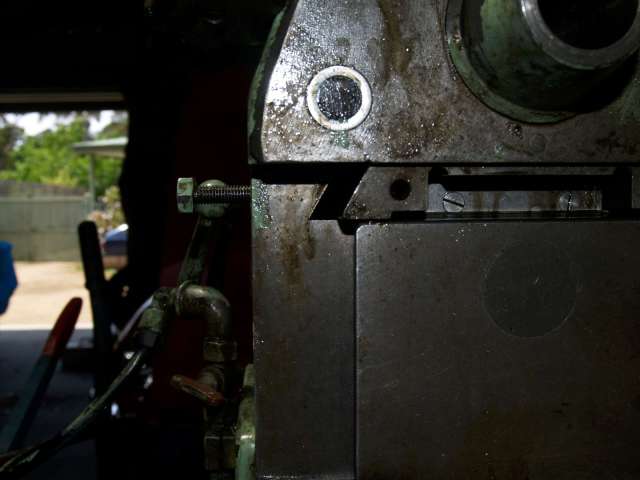
You then have to take off the left handwheel. Mine is held on with a taper pin that you have to knock out. If you’re going to take the whole bed off, not just the spindle, you also need to take off the endcap on the left hand side. You’ll also need to take off any trip dogs, position indicators and stops that might get in the way. After you’ve taken off the handwheel and endcap on the LEFT side, you need to undo these spindle nuts on the RIGHT side. I didn’t have the C spanner to fit these, but they knocked off quite easily with a drift.

Once the nuts and handwheel are off, you can wind out the spindle. If you want to take the bed off, loosen the gibs (the screws are on the front face and will be tight- maybe use an impact driver). Then you can slide it off and set it aside.
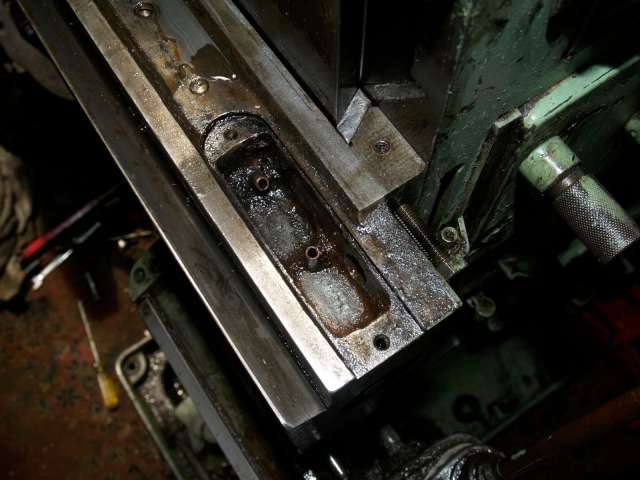
Removing the X-bed exposes this lube cover. This is the lubrication feed for the spindle and autofeed gears. On mine, some idiot broke the sightglass and then filled the reservoir with grease. I won’t say who did it, but it rhymes with “devious boner.”
The sightglasses are pretty easy to replace, at least. They’re a light press fit into a diameter 20 hole. I used part number GN537-16-20-A from Ganter. You can buy them here.


Anyway, you should never use grease here. The unit is designed for oil. Those tubes hold wick that distributes the oil to the feed gears and spindle… grease will not carry at all. After some time, this would have ruined the gears.
Now, if you want to remove the saddle to get at the feed gears, you have to remove the horizontal spindle. To do this, first take off the cover on the front.
Next, take off the vertical spindle. You don’t have to, but it will be much lighter and it’s only two bolts.

Now it’s gone.
Now with the head gone, we can see the drive gear. There’s two wickholes to take lubrication… uh.. somewhere. Probably to drop it on the horizontal spindle drive gear.

Here’s the other one.
You need to move the markers for the Y axis out of the way. Now you see them…

…Now you don’t…
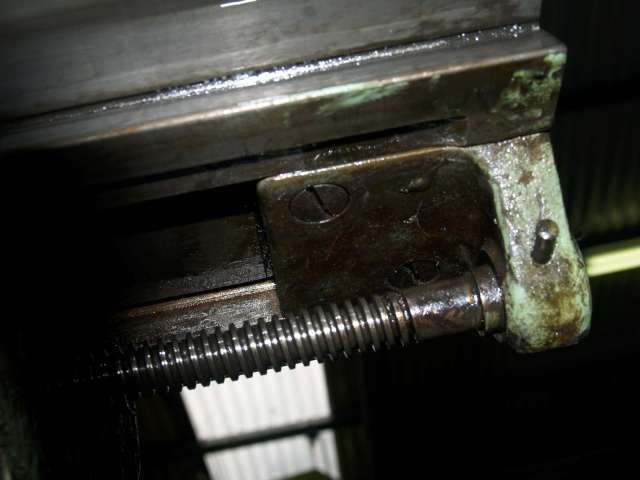
Here’s the back of the Y axis. You need to knock out the taper pin on the spindle carrier at the back.
Then undo these screws
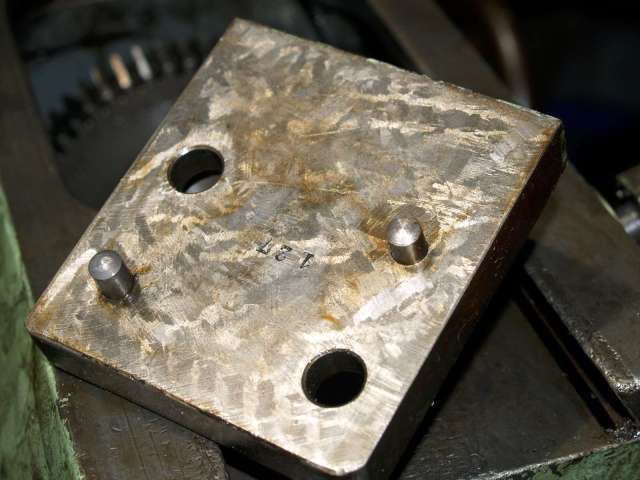
There are few things more beautiful in the engineering world than a scraped surface. This carrier sits on pins for location. They’re a clearance fit, so it doesn’t take much convincing to get it off. A few taps on the top off the back of the head did the trick for me.
Next, you need to loosen the gibs for the Y axis
Then, knock out the gib. This will give you enough clearance to lift the head just that little bit
Here’s a diagram showing how you need to tilf/lift the head to slide it off. There’s a gear that overhangs too much to get it off without doing this.

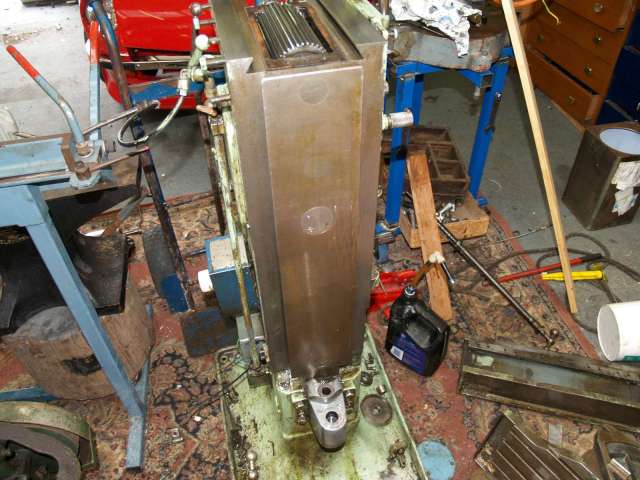
Now the horizontal spindle is gone, leaving just the saddle.
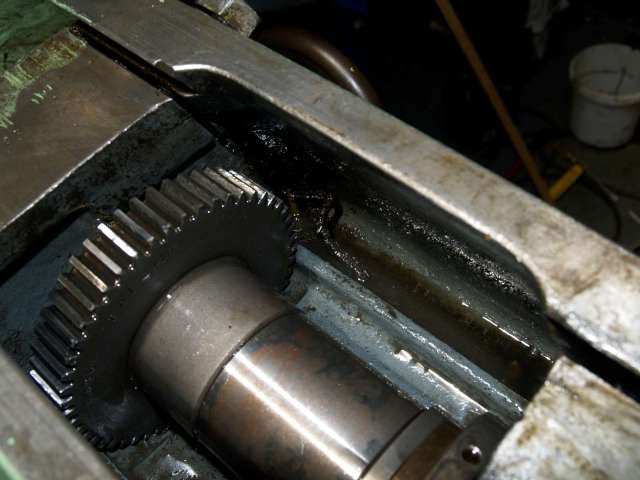
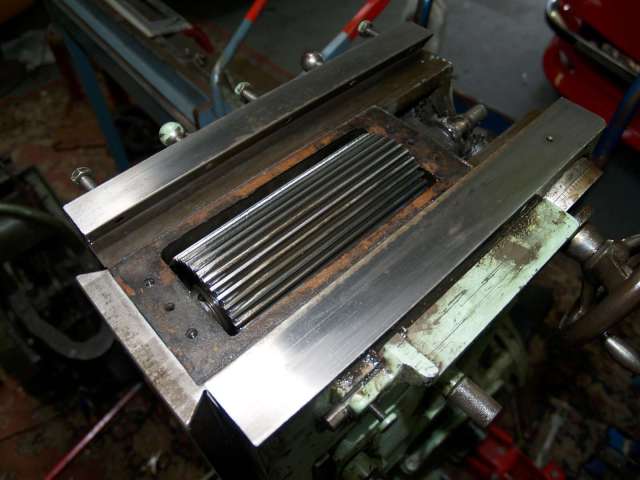
Here’s the horizontal spindle drive gear. It’s long so that it can drive the spindle as it translates along the gear axis. I should say here that these are actually assembly photos, not disassembly photos. This stuff was all covered with swarfy gunk when I took them apart.
When you take the covers and felt seals off, you can see the oil channel. Those two wicks from the head must drip onto either side of this. The oil then drips alond the length of the long gear.
Now the oiling parts are removed, too.
To get off the saddle, you need to remove the Z axis trip dogs. You’ll also need to loosen the gib (remove it altogether if it’s still tight). Take off the little cover around the vertical leadscrew. Then, you can wind it up until the leadscrew disengages and then lift off the saddle.
Here’s the bare mill.
You can access the gears inside by taking off a cover plate.
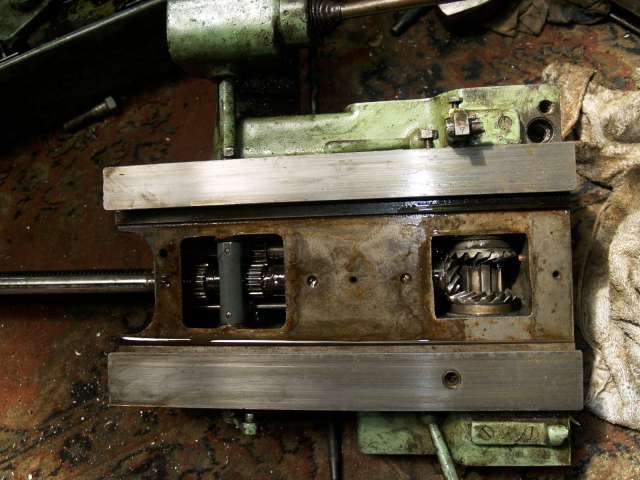
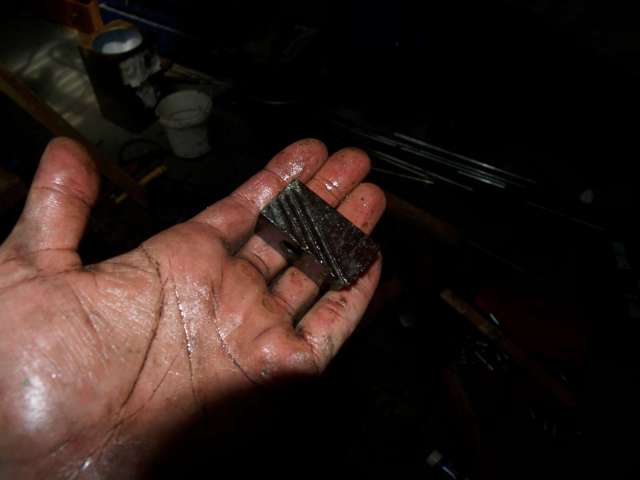
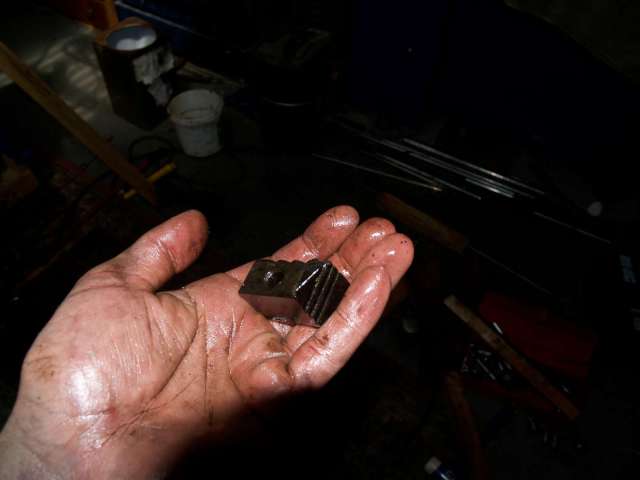
These bevel gears are for the X axis autofeed.
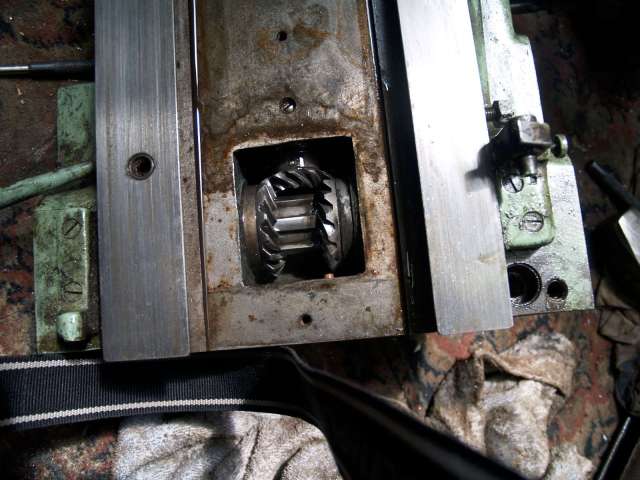
These spur gears are for the Z axis autofeed. You can see the shear pin holding on this gear. This is what I thought had sheared when I first decided to take it all apart. Turns out, I just wasn’t turning the spindle fast enough to see anything move. Ah well. At least it’s clean now.

Assembly is just the reverse of disassembly. I’m typing this all from memory, so I may have forgotten something (but hopefully not). While I was cleaning out the coolant sump, I drilled and tapped it to M16 and plugged it with a bolt… should make it easier for next time. I don’t understand what the hell they were thinking when they lfet that little detail out.

I thoroughly enjoyed that.
Great job guy, congratulation! My owner’s Deck si lime your, and need a restyling….after I’ll receive 380 v in my house…..I golpe it works well…..see you! Enrico
Brill
Pingback: FP1 x axis Table removal
Great pics. This helped me quite a bit to start servicing my Deckel. I was wondering which materials you used to replace the wicks in the table and where you got it?
Hi Joe,
Congrats on your ownership of the most awesome mill design ever.
I did a bit of a quick and nasty rebuild so I just looked around for some loosely stranded string and used that.
If I wanted to get a bit fancier I might find a craft store or some place that does candle making supplies and ask them for some candle wick.
Thanks, I had an order ready for McMaster and found someone that mentioned the candle wick as well, so I ordered a small roll of that. Your pics have probably been the most helpful ones I have seen on taking apart the FP1.
Hi Joe, here again ….my FP1 works now but I’ve found an incredibile end float on the X axis, about 2 mm (!!!). I can move the table by hand.
In owner manual there are no info about regolation of this problem: do you know if exist any register or you think the cochlea si irreparably damaged and needs eventually substitustion?
Thank You for YouTube attention, I’ve a small movie too, infatti you like I’ll send to’ your private mail
Ciao from Italy
Enrico
Hi Enrico,
Mine also had a lot of float in the x axis. When I took it apart, I found that the bronze spindle nut was severely worn. I suspect that this was because of lack of lubrication (what happens when you put grease in a machine designed for oil). This might be the problem that you have. My memory is a little hazy now but if I recall correctly, you will also get float in the x axis if you haven’t locked up the spindle correctly. You can check this by turning the handle and watching those spindle nuts that you need a C-spanner to undo. If they are moving sideways, they are causing slop.
In the short term, I’ve fitted a DRO so I can have some idea of where the table really is and I lock the slide if I don’t want it to move around. In the longer term, I’ll either have a crack at making my own on my lathe or buy a replacement from Germany. Since you’re in Italy, that might be a good option. Here’s a link to one on ebay: http://www.ebay.de/itm/X-Achse-Spindelmutter-FP1-bis-Bj-1950-fur-Deckel-Frasmaschine-/381455772579?hash=item58d0892ba3:g:2O4AAOSwniRWN6-~
Hope it goes well for you.
Hi Enrico,
Greetings from Singapore!
I used Deckel mill many years back during my school training as a machinist.
Now I have fond memories of this super machine that’s no long in production. Lately, I made a replic of a smaller desktop version out of mild steel plates and aluminium blocks. But I face problems with the fabrication of the saddle extruded gears like in your photos and other issues.
Wonder could you help me out with further guided images 🙂
Wishing to hear from you soon!
Regards,
Steve W.
Hi Steve,
What would you like to see images of? I’ll help out however I can.
Hi Enrico
Thanks for the reply!
Possible to disclose me your pte email so that I can attach some images of the Deckel replica. To point out some fabrication issues rather to explain in words…
Regards,
Steve W.
Thanks for your post! I appreciate the time you took to share that info. I just did a restoration on an old FP1 like yours that I use for work and had a question on what kind and how much oil to put in the gear box , and do you fill it from the top? Any help is appreciated ! Steve Potts
Hi Steve,
Sorry but I’m afraid In won’t be much help at the moment- I’ve moved country and all my Deckel reading material is back home so I don’t know what you’re supposed to use. The ways in mine were heavily worn, so I just used some leftover ATF.
Nice work. Do you have a manual for this milling machine? I just got mine 2 days ago, i would like to adapt an ISO40 tool holder instead of the original MT4 i have.
Sorry for the late response- I do back home but I live in another country now, so I’m afraid I’m no help. 😦
Hi, anyone have installation guide? after dismantled the wires, I do not know how to connect it…
please help
I can help with some info